Add and Manage Telescopes
Welcome to Citra Space! This guide will walk you through the process of adding and managing telescopes for tasking within the Citra platform. Whether you’re a new user or looking to expand your existing setup, this tutorial will provide step-by-step instructions to help you get started.
Prerequisites
A telescope or camera capable of astrophotography is required for accepting tasking requests. However, you can still create an account and add offline telescopes to explore the platform’s features.
Create a Citra Space Account
Visit the Citra Space app at https://app.citra.space and choose SIGN IN, then choose Create an account in the Sign in form and follow the prompts. For full sign up instructions, see the Sign Up guide.
Add a Ground Station
The ground station represents the physical location where your telescope(s) and other equipment are installed. It serves as the hub for managing your observation devices and coordinating tasking requests within the Citra platform. It also opens up additional features such as weather monitoring and a satellite access window calculator that can identify targets for a telescope.
Telescopes can also be added without a ground station on the Sensors page to be assigned later. However, telescopes and other sensors cannot be tasked without a ground station.
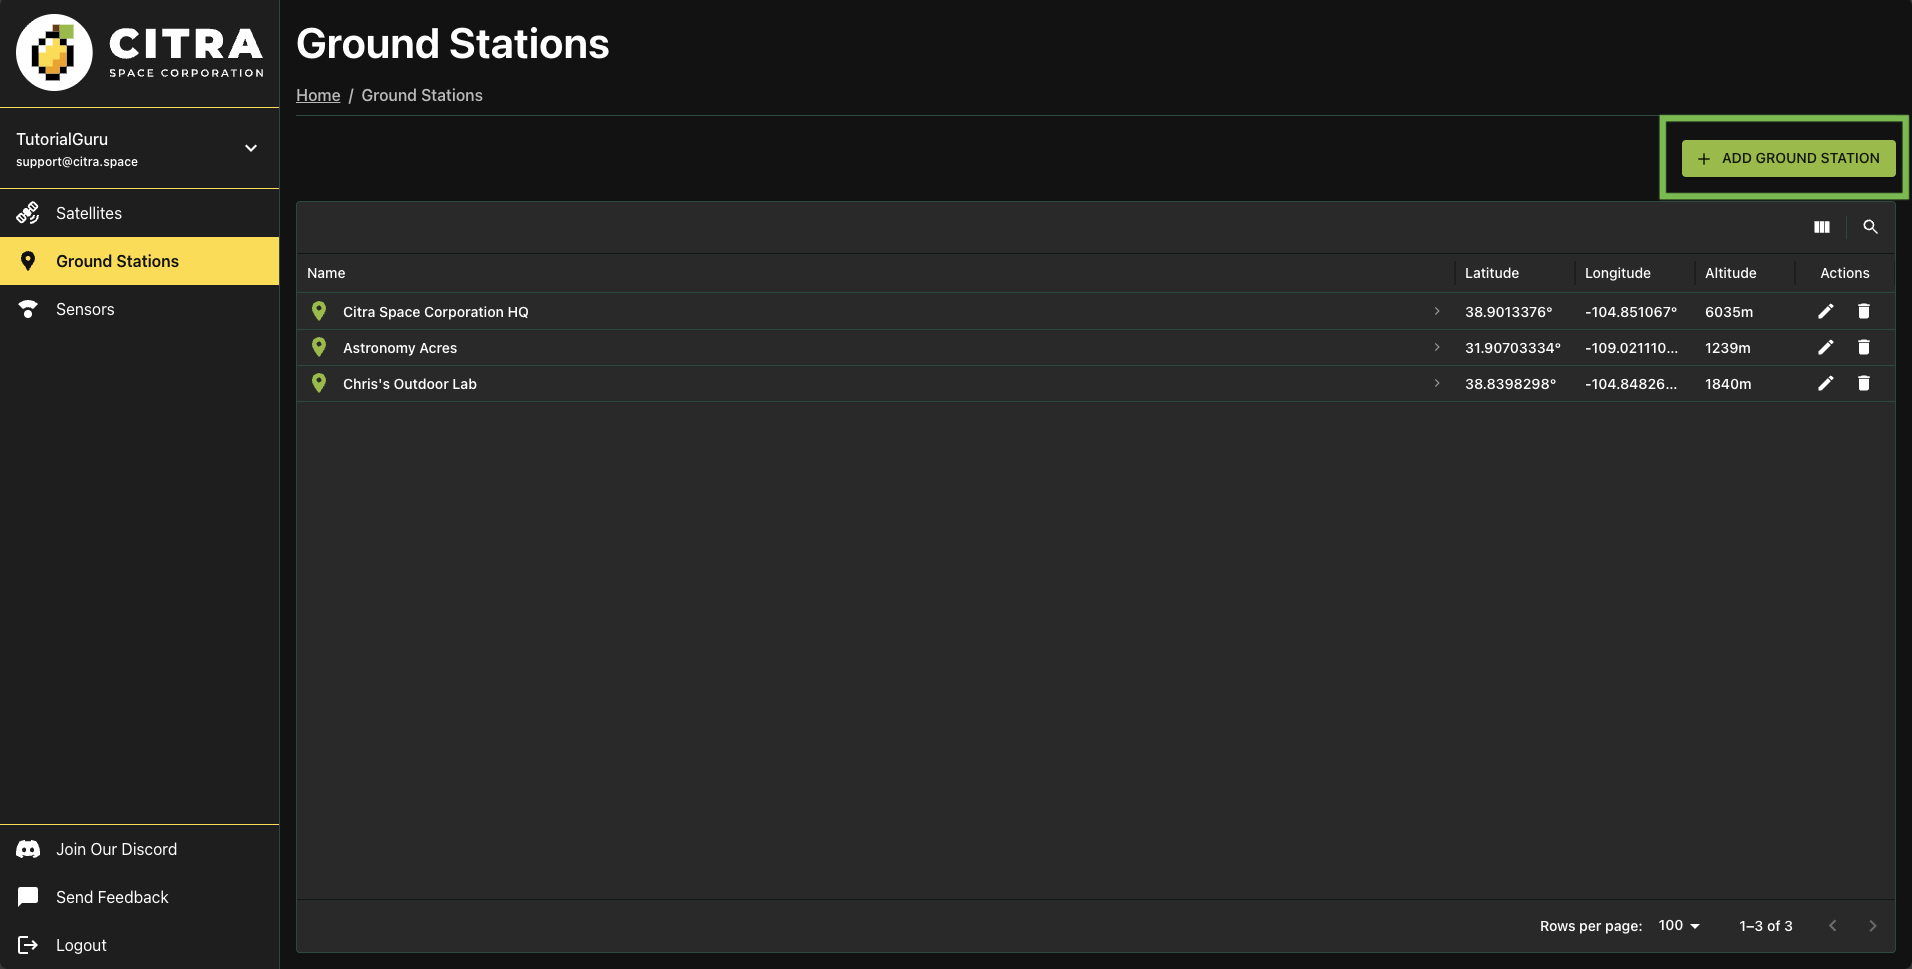
Visit the Ground Stations page and choose ADD GROUND STATION.
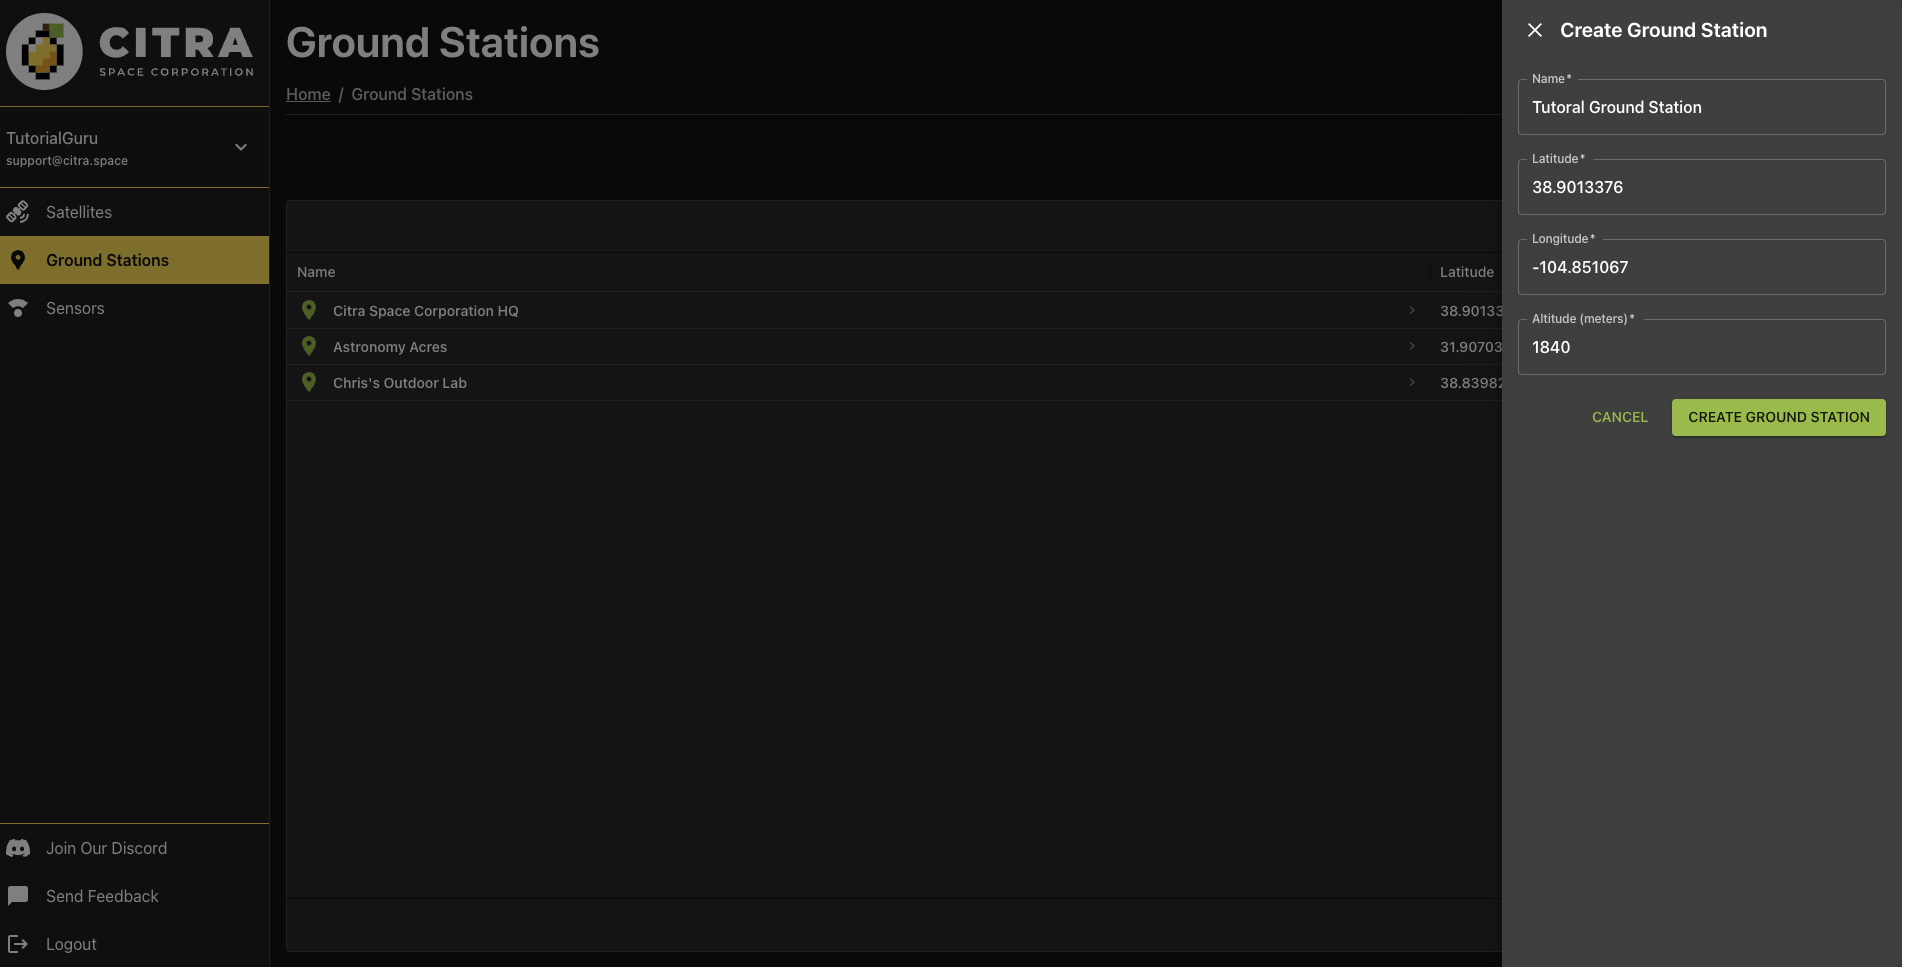
Complete the required fields in the Create Ground Station form then choose CREATE GROUND STATION. The location will be used for weather monitoring, satellite access window calculations and as a location coordinate reference for images uploaded for a telescope.
Completing the form will redirect to the new ground station page.
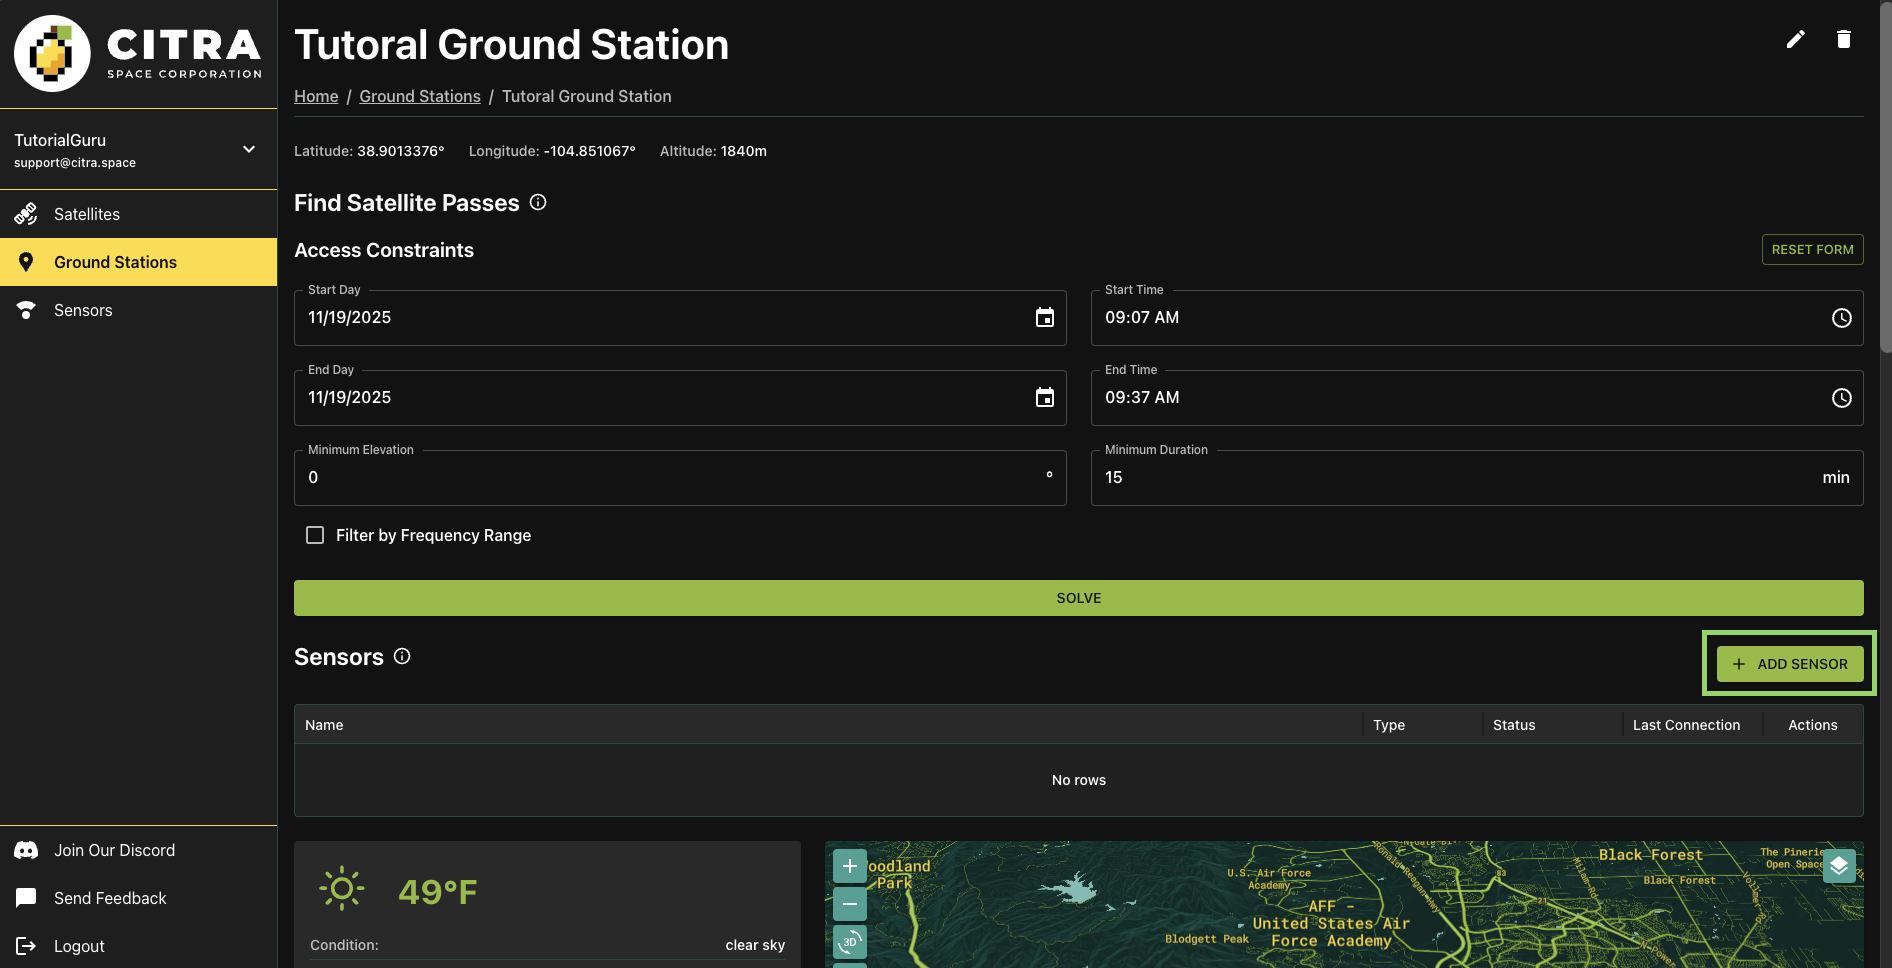
Choose the ADD SENSOR button to add a telescope to the ground station.
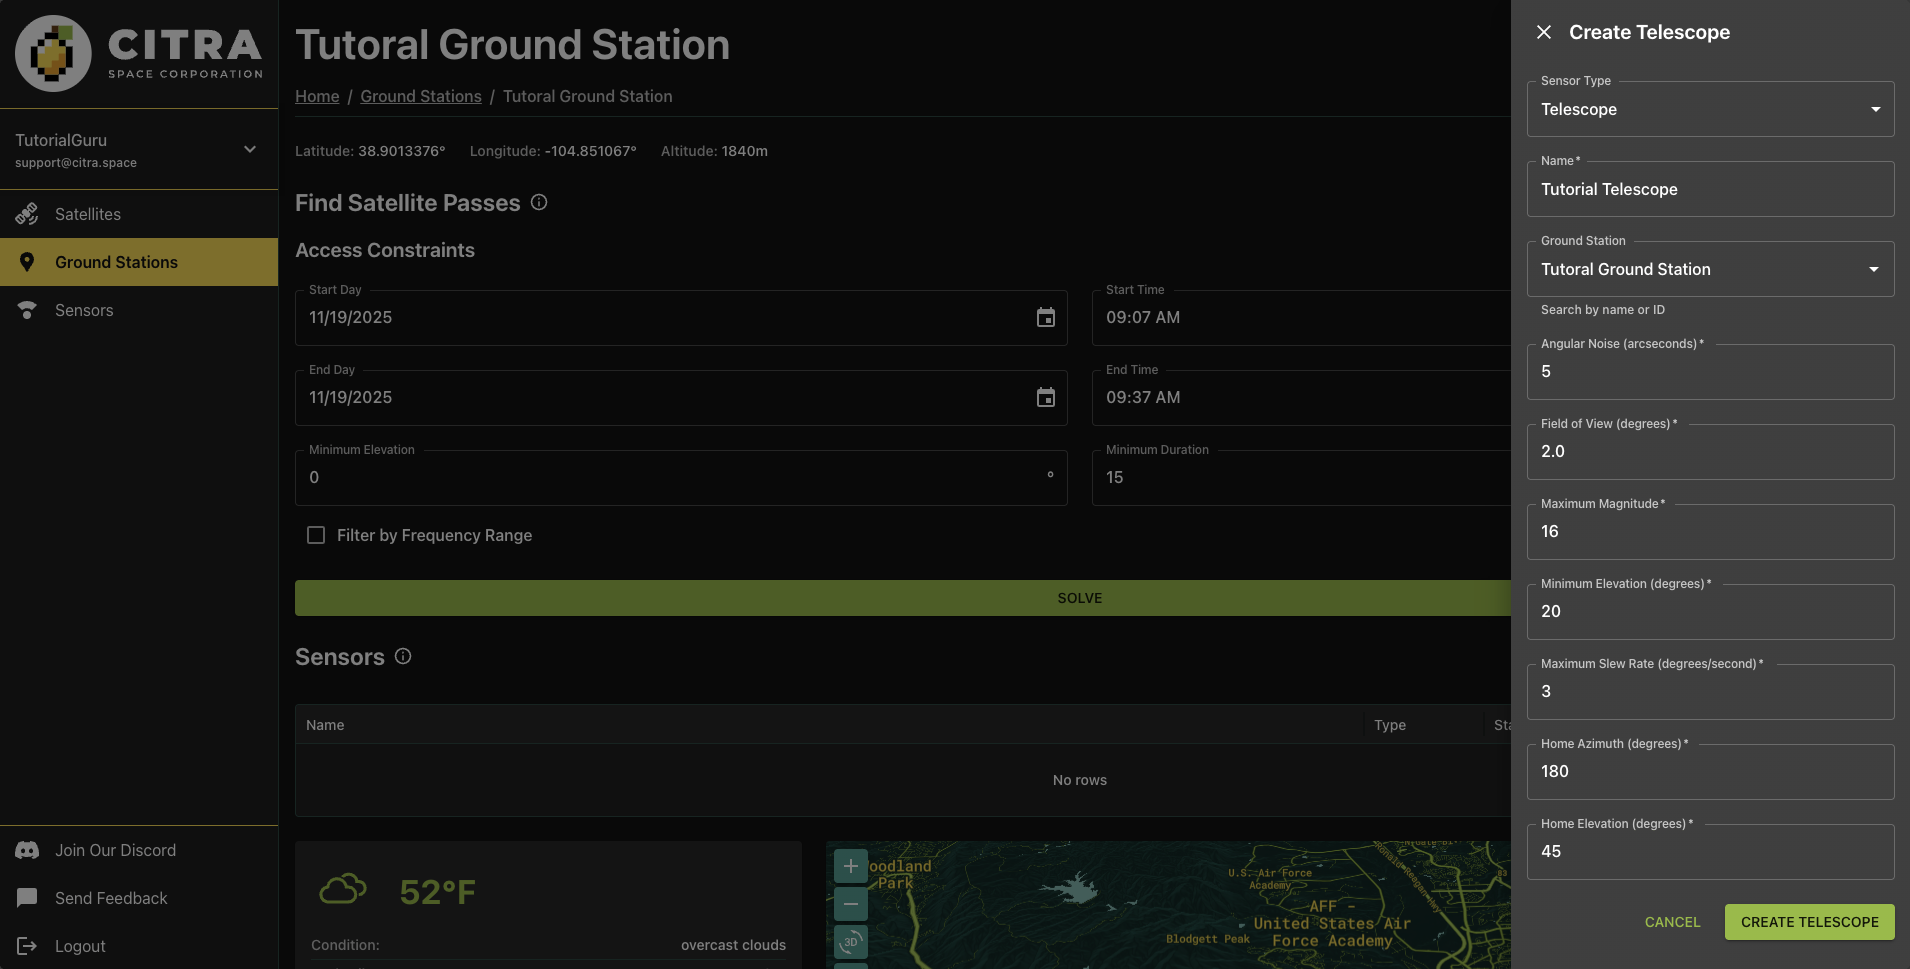
In the Create Telescope form, the Sensor Type of Telescope is pre-selected. It’s also possible to add antennas (see Add and Manage Antennas). Leave the default selection.
Name
Give the telescope a descriptive name in the Name field. This helps identify the telescope when managing multiple sensors or reviewing tasking assignments.
Ground Station
The current ground station will be pre-selected in the Ground Station field. Leave as-is unless you want to assign this telescope to a different ground station.
Angular Noise (arcseconds)
Angular noise represents the pointing accuracy or jitter of your telescope mount, measured in arcseconds. This value indicates the expected deviation in pointing precision due to mechanical limitations, atmospheric effects, or tracking errors. Lower values indicate better pointing accuracy. For stationary camera setups on tripods, enter 0.
Field of View (degrees)
The field of view is the observable area your telescope can capture in a single image, measured in degrees. This depends on your telescope’s focal length and camera sensor size. A wider field of view allows you to capture larger portions of the sky but with less magnification. To calculate your field of view, you can use online FOV calculators with your telescope and camera specifications.
Maximum Magnitude
The maximum (faintest) magnitude represents the dimmest object your telescope can detect. In astronomy, larger magnitude numbers indicate fainter objects. This value depends on your telescope’s aperture, camera sensitivity, and exposure capabilities. For example, a value of 15 means you can detect objects as faint as magnitude 15.
Minimum Elevation (degrees)
The minimum elevation is the lowest angle above the horizon that your telescope can safely point, measured in degrees. This accounts for physical obstructions like buildings, trees, or the mount’s mechanical limits. Typical values range from 10 to 30 degrees, though this varies by location and setup.
Maximum Slew Rate (degrees/second)
The maximum slew rate is the fastest speed at which your telescope mount can move between targets, measured in degrees per second. This affects how quickly you can reposition for new observations. For stationary camera setups on tripods, enter 0 since they cannot automatically slew to new positions.
Home Azimuth (degrees)
The home azimuth is the default horizontal angle position (compass direction) where your telescope rests when not in use, measured in degrees. Azimuth is measured clockwise from north (0°/360° = North, 90° = East, 180° = South, 270° = West). This represents your telescope’s parking position.
Home Elevation (degrees)
The home elevation is the default vertical angle position where your telescope rests when not in use, measured in degrees above the horizon. This represents your telescope’s parking position. A value of 0 means horizontal, while 90 means pointing straight up at zenith.
Choose CREATE Telescope to add the telescope.

The new telescope will be listed in the Sensors section of the ground station page. Click on the telescope name to view details and telescope features.
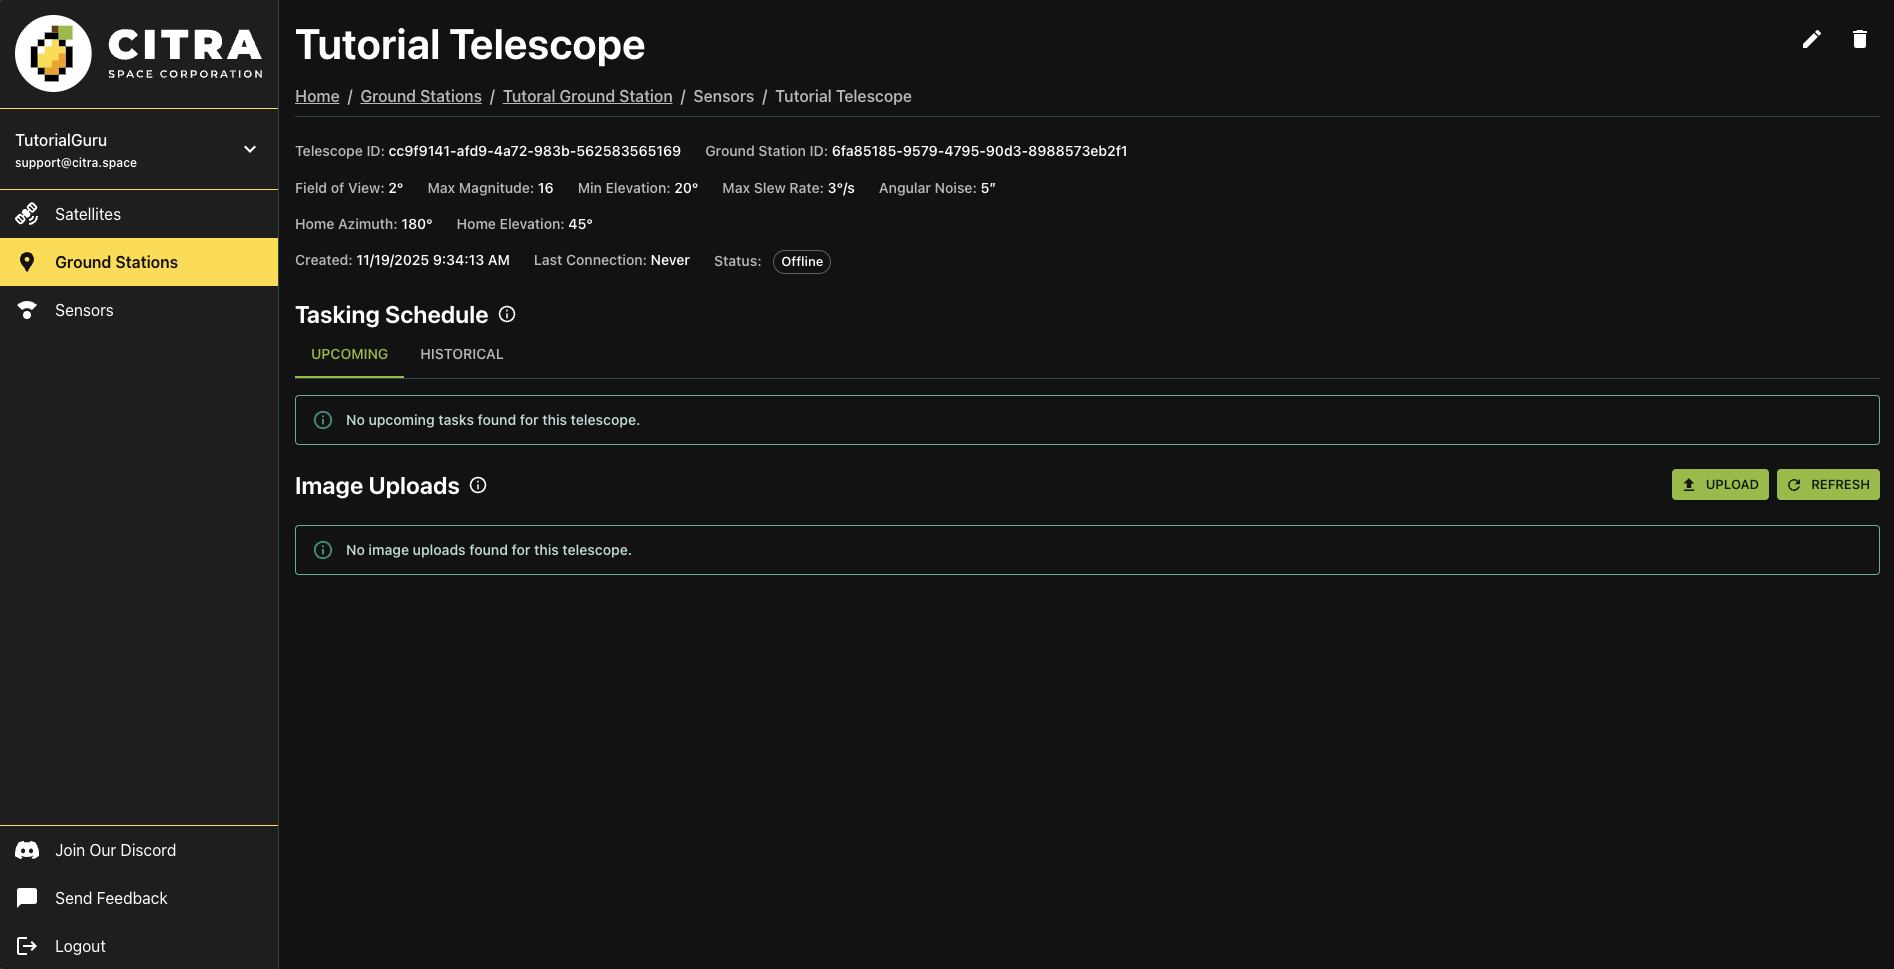
Tasking Schedule
The telescope page features a Tasking Schedule section that displays upcoming tasking requests assigned to the telescope. This is part of an upcoming feature and will be expanded in future releases.
Image Uploads
The telescope page also includes an Image Uploads section where images captured by the telescope can be uploaded and viewed. It can be used immediately to manually upload images for review.
To upload an image, choose the UPLOAD button and choose an image in FITS, jpg, or png format. Note that if GPS coordinates are not included in the FITS header, it will default to the ground station coordinates.
The image will be queued for processing. This will mark stars and satellites detected in the image and generate a preview that can be viewed directly in the app.
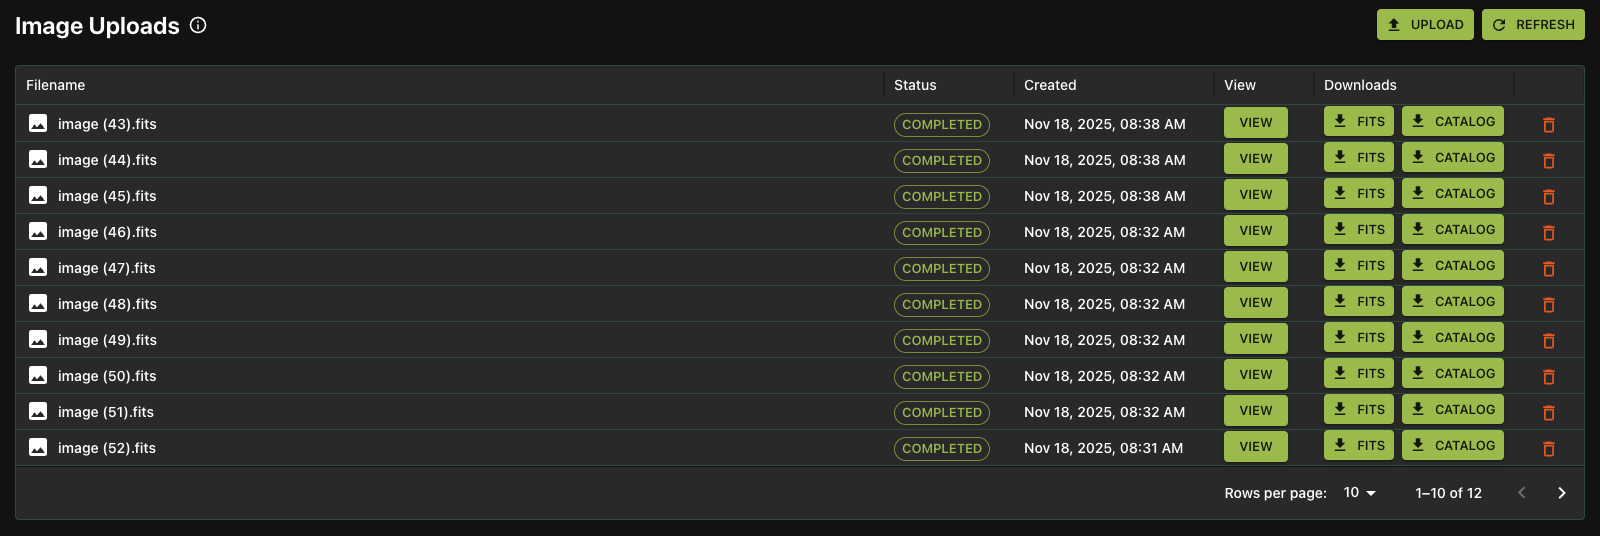
Once processed, the image will be listed in the Image Uploads section with a status of COMPLETED. Choose the FITS and CATALOG buttons to download the processed FITS file and a catalog of detected objects in the image, respectively.
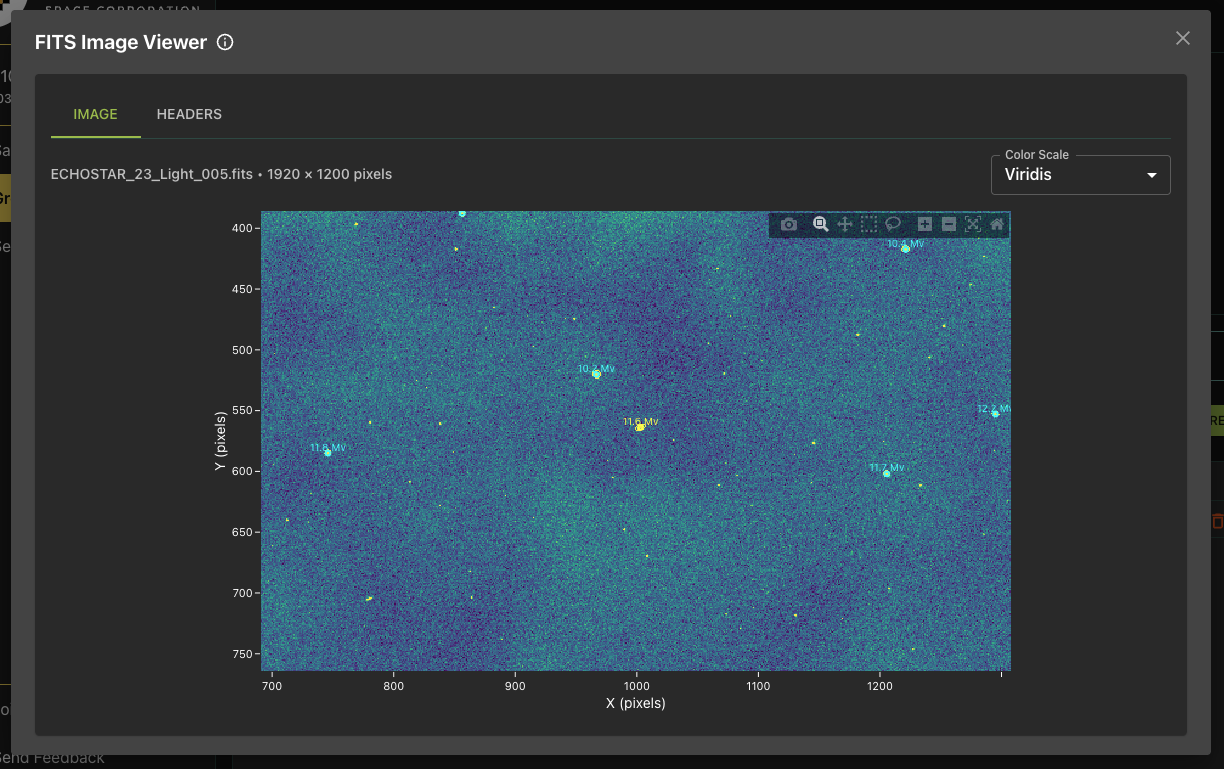
Click the VIEW button to see the image preview with processed data overlay that includes stars and detected and a growing list of other findings at the time of writing.
The API can also be used to upload observation images programmatically. See the API Documentation for more information.
Next Steps
Visit the telescope’s ground station page for weather and visibility forecasts. Calculate what satellites will be flying over the telescope’s location over a given time range. Join our Discord community to offer feedback.
Automate observations with CitraSense
Once your telescope is registered, you can hand over tasking, imaging, and upload to CitraSense — an open source daemon that runs on the telescope computer and handles full dusk-to-dawn sessions unattended. See Getting Started or flash the Raspberry Pi image for a pre-built headless setup.
Support
Have questions or need assistance? Join our Discord community to get support from multiple folks in the space. You can also select Send Feedback in the left navigation menu from within the app.